Women's hairstyle guide
Old Hollywood waves
Smooth, glossy, red-carpet waves. The glamorous look that never dates.
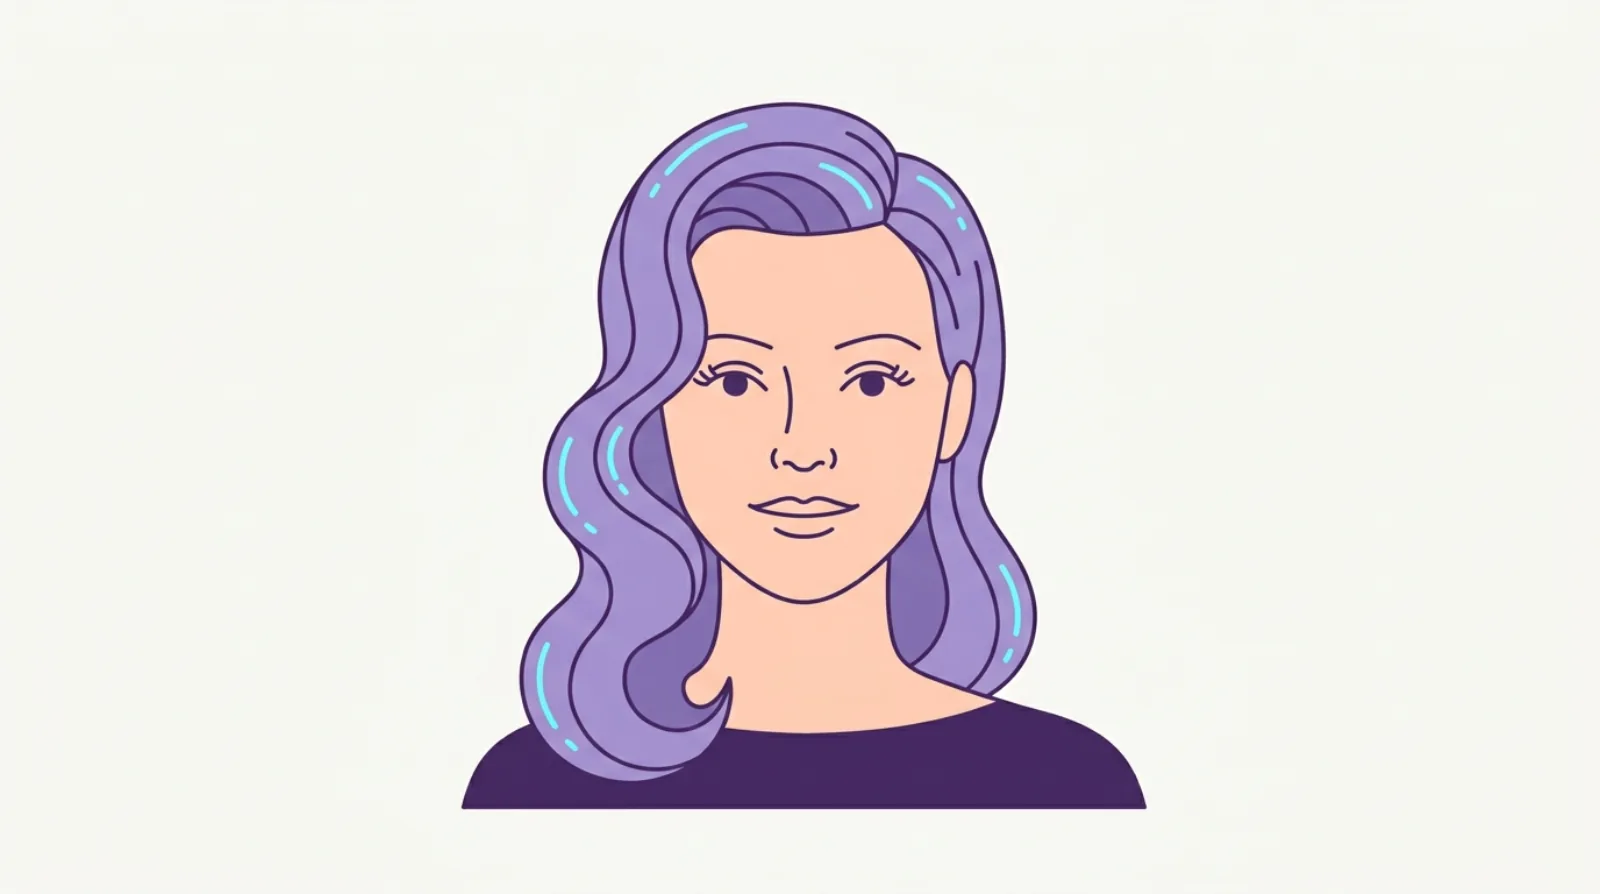
Old Hollywood waves are the polished, glossy waves you see on a red carpet or in an old black-and-white film. The hair falls in smooth, even S-shaped curves, all brushed out to a soft shine. It is one of the most glamorous ways to wear your hair, and it looks just as good at a wedding as it does at a formal. This guide covers what the waves are, where they come from, who they suit, and how to create them at home step by step.
Find out whether this suits your face. One selfie, and the face-shape read and your top pick are free.
Kurli is an AI hairstyle advisor: upload one selfie and it reads your face shape, recommends the cuts that suit it, and renders any of them onto your own photo before you commit.
What Old Hollywood waves are
Old Hollywood waves are smooth, glossy waves that fall in a clear S shape. Picture a ribbon that bends one way, then the other, then back again in an even pattern. That repeating bend is the wave. When every wave lines up down the length of your hair, you get the soft, flowing look that makes this style so recognisable.
The two things that set these waves apart are polish and shine. The curves are brushed out until they are smooth, with no frizz and no separate ringlets. The surface catches the light, so the hair looks glassy and expensive. This is not a messy, beachy look. It is neat, styled, and deliberate.
The waves usually sit in one direction and follow the same pattern on both sides of the head. Often the whole style is swept over to one side, so the waves fall across one shoulder. That deep side sweep is a big part of the classic red-carpet look.
The finished result reads as glamorous and grown-up. It is the kind of style people describe as timeless, because it has looked elegant for nearly a hundred years and still does. If you want to see how it sits next to other options, browse the women's hairstyles hub or compare it with softer beachy waves.
A short history of the look
Old Hollywood waves come from the 1920s and 1930s, the early days of the film industry. Back then a tight, sculpted version called the finger wave was popular. Stylists pressed the hair into flat S-shaped ridges by hand, using their fingers and a comb while the hair was wet and set with a styling lotion. The result was a hard, shiny, moulded wave that sat close to the head.
By the 1930s and 1940s, film stars started wearing a softer, looser version. The waves were still smooth and glossy, but they were brushed out so they flowed instead of gripping the scalp. This is the look most people mean when they say Old Hollywood waves today. It framed the face on screen and looked glamorous under studio lights.
The style became linked with the glamour of the movies, and it never really went away. It comes back again and again on red carpets, at award shows, and in bridal photos. Modern versions are usually the soft, brushed-out kind rather than the tight finger wave, though some people still wear the sculpted version for a strong vintage statement.
You do not need to know the history to wear the style. But it helps to know that when a stylist talks about a finger wave versus a soft Hollywood wave, they are pointing at these two versions: one tight and moulded, one loose and flowing.
 More in women's hairstylesHigh ponytail
The two main looks
Old Hollywood waves come in a couple of main forms, and it helps to know which one you want before you start.
All-over soft waves. Here the waves run down the whole head in an even pattern, parted in the middle or slightly off-centre. Both sides match, and the hair falls smoothly around your face. This version is balanced and elegant, and it suits people who like a symmetrical, tidy look. It is a common choice for brides, because it photographs well from every angle.
Deep side-swept waves. This is the glamorous red-carpet version. You make a deep part on one side, then sweep the hair across and over, so the waves fall down one shoulder. One side is tucked close to the head, sometimes pinned behind the ear, while the other side carries all the movement. It looks dramatic and dressy, and it draws the eye to one side of the face. This is the version most people picture when they think of a film star on a red carpet.
A note on the finger wave. The tight, sculpted finger wave is a third option. The waves grip close to the head in flat ridges, often only around the crown and sides, with the ends left curled or tucked under. It is a bold, retro statement rather than an everyday look, and it takes more skill to set. Most people choose one of the two softer versions above.
Once you know which look you are after, the rest of the guide will make more sense, because the side-swept version needs a deeper part and a firmer pin on the tucked side.
Who they suit and which face shapes they flatter
One of the best things about Old Hollywood waves is how widely they flatter, because you can adjust where the waves sit and how deep the part is.
Round faces do well with a deep side part and side-swept waves. The off-centre part adds a slanted line, and sweeping the volume to one side makes the face look a little longer and less wide. Keep the waves starting lower down, below the cheeks, so they do not add width at the widest part of the face. Learn more in the hairstyles by face shape guide.
Long or oblong faces look best with the waves kept soft and full at the sides rather than tall on top. Waves that add width around the cheeks help balance a longer face. A middle or shallow side part works well here, since a very deep part can add height you do not need.
Square faces are flattered by the soft curves of this style, because the waves break up a strong, angular jaw. Let the waves fall past the jawline so the movement sits lower than the corners of the face. Avoid a stiff, flat set that draws hard lines.
Heart-shaped faces with a wider forehead and a narrow chin suit waves that add body lower down, near the jaw. A side part helps soften a wide forehead. Keep the top smooth rather than piled high.
Oval faces can wear either version, since the proportions are already balanced. Choose the part and the sweep you like best.
The general rule holds for everyone: a deeper side part and lower-sitting waves flatter most faces. Not sure which shape you have? The face shape quiz gives you a quick read.
Not sure which face shape is yours? Kurli reads it from one selfie and shows the cuts that suit it.
Best hair lengths and textures
Old Hollywood waves show off best at certain lengths and take a bit more or less work depending on your natural texture.
Length. Medium and long hair is the classic canvas. There is enough length for the S-shaped waves to repeat two or three times down the hair, which is what gives the flowing look. A long bob (a lob) also works well, and it gives a chic, shorter take on the style. Very short hair can wear a version of this look too, usually as a tighter finger wave around the crown and sides, since there is not enough length for long, flowing waves.
Straight hair. Straight hair gives you the smoothest, glossiest result once it is waved, because the surface stays sleek. The catch is that straight hair, especially fine straight hair, can drop the wave over the day. A setting spray and cool-down time help it hold.
Wavy hair. Natural waves give you a head start, but they rarely fall in the neat, matching pattern this look needs. You will still want to iron them into an even S shape so every wave lines up.
Thick hair. Thick hair holds a wave beautifully and keeps it all day. The trade-off is that it takes longer to curl the whole head, so leave yourself extra time.
Curly and coily hair. You can absolutely wear this look with curly or coily hair, but it usually means smoothing the hair first with a blow-dry so it is straight enough to set into uniform waves. Because heat straightening and then curling is a lot of heat in one session, be gentle. Use a heat protectant, keep the tools at a medium setting, and do not do it too often. For more on working with your texture, see hairstyles by hair type.
How to create them step by step
Here is a reliable method for soft, brushed-out Old Hollywood waves at home. Read it through once before you start, because the order matters.
1. Start with smooth, prepped hair. Work on clean, dry hair. Straighten it first if it is wavy or curly, so you are starting from a smooth base. Spray a heat protectant over all of it. This is the single most important step for protecting your hair from the iron.
2. Make your part. Decide on a middle part for the all-over look, or a deep side part for the glamorous side-swept version. Comb it in cleanly now, because it is hard to change later.
3. Curl every section the same way. Take sections about two to three centimetres wide. Wrap each one around a curling iron, and here is the key: curl every section in the same direction, away from your face. Keeping the direction the same is what makes the waves line up into a smooth S shape instead of a random mess. Hold each section on the iron for a few seconds, then release.
4. Clip each curl to cool. As you release each curl, gently coil it up toward your scalp and pin it flat against your head with a clip. Letting the curls cool while they are pinned sets the shape and makes the wave last much longer. This step is the secret behind waves that hold all night.
5. Let everything cool fully. Once the whole head is curled and clipped, wait. Give the curls ten to fifteen minutes to cool completely. Cool, set curls brush out into smooth waves. Warm curls fall flat.
6. Brush it all out. Take the clips out. Now brush the whole head through with a boar-bristle brush. Brush firmly from root to tip. It will feel like you are wrecking the curls, but this is what turns tight curls into soft, connected, glossy waves. Keep brushing until the S shape appears and the surface is smooth.
7. Shape and set. Use your fingers or the tail of a comb to nudge the waves so they all line up. If you are doing the side-swept look, sweep everything to one side and pin the tucked side behind your ear. Finish with a light mist of flexible hairspray and a small amount of shine spray or serum on the ends. That gloss is what makes the waves read as Old Hollywood.
Tools and products you will want
You do not need a lot of specialist kit, but a few tools make a real difference to this look.
A 1 to 1.25 inch curling iron. A barrel around this size gives waves that are the right scale for the style: not too tight, not too loose. A clip-style iron or a clipless wand both work. Straight, smooth barrels give a cleaner wave than textured ones.
Sectioning clips and flat clips. You need clips to hold the hair you are not working on out of the way, and flat pin-curl clips or simple duckbill clips to pin each finished curl against your head while it cools. The cooling-in-place step is what sets the wave, so do not skip these.
A boar-bristle brush. This is the tool that makes the waves. A boar-bristle brush smooths the hair and spreads its natural oils, which adds shine while it blends the curls into connected waves. A soft, natural-bristle brush gives a glossier result than a plastic one.
A flexible-hold hairspray. Choose a spray that holds the shape without going stiff or crunchy. You want the waves to move and shine, not sit like a helmet. A light mist after brushing sets the pattern.
A shine serum or shine spray. A small amount of serum or a light shine spray on the mid-lengths and ends gives the glassy finish that defines this look. Use a little, because too much makes hair look greasy rather than glossy.
A heat protectant. This one is not optional. Since the whole style is built with a hot iron, a heat protectant spray before you curl helps limit the damage that heat does to your hair. Dermatologists point out that heat styling is one of the main causes of hair damage, so protecting the hair first is worth the extra thirty seconds. See the haircuts by length guide for more on matching a style to your hair.
A no-heat alternative
You can get soft waves without a hot iron at all, which is kinder to your hair and easy to do overnight.
The robe-tie or fabric wrap method. Take a long, soft fabric strip, like a dressing-gown tie or a length of soft ribbon. Part your damp hair and pin the tie to the top of your head. Wrap sections of hair around the tie, adding more hair as you work down, a bit like a rope. Do the same on the other side. Sleep on it, or leave it a few hours until the hair is dry, then unwrap and brush it out with a boar-bristle brush. You get smooth, bendy waves with no heat.
Foam or fabric rollers. Set damp hair on large foam or fabric rollers, all rolled in the same direction, and leave them until the hair is fully dry. Larger rollers give the soft, wide wave this look wants. Because there are no hard pins, you can even sleep in soft rollers.
Pin curls. For a more traditional route, coil small sections of damp hair into flat curls and pin each one to your head. Let them dry fully, then brush out. This is close to how the original waves were set, before hot irons were common.
The key with any no-heat method is the same as the heat version: work in the same direction, let the hair dry or set completely before you unwrap, and brush it out to connect the waves. The result is a little softer than an ironed set, but it is gentle on your hair, and it is a good choice if you wave your hair often. For a more casual finish, the same no-heat idea gives you beachy waves too.
Making them last for an event
If you are wearing these waves to a wedding or a formal, you want them to hold from the first photo to the last dance. A few habits make that happen.
Start with the right base. Clean hair that is a day old holds a wave better than freshly washed hair, which can be too slippery. If your hair is very clean and silky, a light mist of setting spray or texture spray before you curl gives it grip.
Do not skip the cool-down. The pin-and-cool step is the biggest factor in how long waves last. Curls that cool while pinned to your head hold for hours longer than curls you brush out while they are still warm. Give them the full ten to fifteen minutes.
Set it in layers. A light mist of flexible hairspray before you brush, and another after you shape the waves, locks the pattern in without making it stiff. Building the hold in thin layers holds better than one heavy blast.
Pin the tucked side. For the side-swept look, a couple of well-hidden bobby pins behind the ear keep the tucked side in place all night, so the shape does not loosen as you move.
Carry a small kit. A travel hairspray and a few bobby pins in your bag let you smooth things down partway through the event. A tiny drop of serum on your fingers can tame any frizz that creeps in as the night goes on.
Done well, a set of Old Hollywood waves can look photo-ready for a full day and evening, which is a big part of why brides and event guests reach for them.
Common mistakes and how to fix them
Old Hollywood waves look effortless, but a few common errors are what separate a glossy set from a messy one. Here is how to avoid them.
Waves that do not line up. This is the number one mistake. If some sections curl toward your face and some away, the waves clash and the S shape never appears. The fix is simple: curl every single section in the same direction, away from your face. Consistency is the whole trick.
Waves that are too stiff. If you use too much hairspray or a strong-hold product, the waves go crunchy and hard, which is the opposite of the soft, flowing look you want. Use a flexible-hold spray and a light hand. The waves should move and shine, not crackle.
Skipping the brush-out. If you leave the curls as separate ringlets, you get a curly look, not Hollywood waves. The brush-out with a boar-bristle brush is what connects the curls into smooth waves. Brush more firmly and for longer than feels natural.
Brushing while warm. If you brush the curls out before they have cooled and set, they fall flat straight away. Wait for them to cool completely before you touch them.
A dull, matte finish. Old Hollywood waves are defined by shine. If yours look flat, you have missed the gloss step. A boar-bristle brush plus a small amount of shine serum on the ends brings the glassy finish back.
Too much heat, too often. Straightening and then curling in one session is a lot of heat. Doing it repeatedly without protection can leave hair dry and brittle. Always use a heat protectant, keep the iron at a medium setting, and give your hair rest days between heat styling.
When to wear them, and pros and cons
Old Hollywood waves are a dressy, glamorous style, so they shine brightest at big-occasion moments.
When to wear them. They are a top choice for weddings, both for brides and guests, because they photograph beautifully and hold all day. They suit formals, proms, and graduations, where you want a grown-up, elegant look. They are lovely for parties, galas, and any event with a dress code. You can wear a softer version day to day if you like, but for most people this is a special-occasion style rather than an everyday one, mostly because of the time and heat involved.
The pros. The look is timeless and elegant, and it reads as expensive even when you do it yourself. It flatters almost every face shape once you adjust the part and the sweep. It photographs extremely well, which matters for weddings and formals. And once set with the cool-and-pin method, it holds for a long time.
The cons. It takes time, often thirty to forty-five minutes to curl and set a full head. It usually needs heat, and layering straightening on top of curling is hard on your hair, so it is not a look to wear every single day. It needs a bit of practice to get the waves lining up, so your first attempt may not be your best. And fine or freshly washed hair can drop the wave without a setting spray and a proper cool-down.
Weigh those honestly. For a big event, the payoff is worth the effort, because few styles look as polished. If you want to wave your hair often, lean on the no-heat method to protect it. Ready to see how it would look on you? Try a style on your own photo with Kurli.
Common questions
What are Old Hollywood waves?
Old Hollywood waves are smooth, glossy waves that fall in an even S shape down the hair. The curves are brushed out until they shine, with no frizz and no separate ringlets. They are a polished, glamorous style linked with red carpets, film stars, and weddings, and they have looked elegant for nearly a hundred years.
How do I make Old Hollywood waves at home?
Start with smooth, dry hair and a heat protectant. Curl every section the same way, away from your face, then pin each curl flat to your head to cool. Let the whole head cool for ten to fifteen minutes, then brush it all out with a boar-bristle brush until the S shape appears. Finish with flexible hairspray and a little shine serum.
Why do I curl all the sections in the same direction?
Curling every section in the same direction, away from your face, is what makes the waves line up into a smooth S shape. If some sections curl toward your face and some away, the waves clash and the flowing pattern never appears. Keeping the direction consistent is the single most important trick for this look.
What size curling iron is best for Hollywood waves?
A 1 to 1.25 inch barrel is the sweet spot. It gives waves that are the right scale for the style, not too tight and not too loose. A smooth, straight barrel gives a cleaner, glossier wave than a textured one. Both clip irons and clipless wands work.
How do I make my Hollywood waves last all day?
Do not skip the cool-down. Pin each curl flat to your head and let the whole set cool for ten to fifteen minutes before you brush it out, because curls that cool in place hold for hours longer. Start with day-old hair or a setting spray for grip, and set the shape with light layers of flexible hairspray.
Can I get Old Hollywood waves without heat?
Yes. Wrap damp hair around a soft fabric tie or dressing-gown cord, or set it on large foam rollers, all in the same direction, and let it dry fully. You can even sleep on it. Unwrap and brush out with a boar-bristle brush. The result is a little softer than an ironed set and much kinder to your hair.
What face shapes suit Old Hollywood waves?
Nearly all of them, because you can adjust the part and the sweep. A deep side part and side-swept waves flatter round faces. Soft, fuller waves at the sides suit long faces. The soft curves flatter a square jaw, and a side part softens a heart-shaped forehead. Oval faces can wear any version.
Why won't my curls turn into smooth waves?
Usually you are skipping or rushing the brush-out. After the curls cool completely, brush the whole head firmly from root to tip with a boar-bristle brush. It feels like you are wrecking the curls, but that is exactly what connects them into smooth, glossy waves. Brush more firmly and for longer than feels natural.
What is the difference between a finger wave and a soft Hollywood wave?
A finger wave is the tight, sculpted version from the 1920s, where the hair is pressed into flat S-shaped ridges close to the head. A soft Hollywood wave is the looser, brushed-out version from the 1930s and 1940s, where the waves flow instead of gripping the scalp. Most people today wear the soft version.
How do I get the glossy shine on Old Hollywood waves?
Two things create the shine. First, brush the waves out with a boar-bristle brush, which smooths the hair and spreads its natural oils. Second, add a small amount of shine serum or a light shine spray to the mid-lengths and ends. Use only a little, because too much makes hair look greasy instead of glossy.
Do Old Hollywood waves damage your hair?
They can, because the style is built with a hot iron and often needs straightening first, which is a lot of heat in one session. Dermatologists note that heat styling is a main cause of hair damage. Always use a heat protectant, keep the iron at a medium setting, give your hair rest days, and use the no-heat method when you wave often.
When should I wear Old Hollywood waves?
They are a dressy, glamorous style, so they shine at big occasions. They are a favourite for weddings, both for brides and guests, and they suit formals, proms, graduations, parties, and galas. Because of the time and heat involved, most people wear them for special events rather than every day.
Sources
Hair biology and hair-care facts on this page are supported by these sources. Styling recommendations are guidance.
- How to style hair without damage, American Academy of Dermatology
- Tips for healthy hair, American Academy of Dermatology
- Everyday hair care, American Academy of Dermatology
- Hair Loss Resource Center, American Academy of Dermatology
- Hair Problems, MedlinePlus, U.S. National Library of Medicine
See it on your own face
Kurli reads your face from a selfie, recommends styles that suit you, and renders each one onto your photo.
The face-shape read and your top pick are free. Your photo is never sold or used to train AI.